OPNsense in AWS
![]()
If you are looking for a firewall, web application firewall or VPN solution in AWS, you will quickly come across the respective managed services that can be activated at the push of a button. However, sometimes these solutions are not flexible or simply cost-efficient enough when it comes to systems that do not necessarily need to be highly scalable and highly available (although OPNsense can also do HA). Apart from that, I am personally not a fan of proprietary solutions that restrict me in configuration and make me dependent on the vendor.
Since I already knew OPNsense from work, even if not in AWS, I thought it would be the perfect solution for one of my projects where cost efficiency and flexibility were the main focus.
Since I couldn’t really find much useful information even when searching for tips or instructions on how to get OPNsense up and running in AWS, I wanted to write down my personal instructions here, along with a few insights into subtleties that I would have liked to have known earlier 😅.
At the beginning we have to install the firewall of course, for this we can simply follow the following instructions directly from the OPNsense Doc: Installing OPNsense AWS image.
Again the TL;DR for those who already know the procedure to install an EC2 instance:
- Subscribe to the OPNsense AMI
- Configure the instance
- Start in the desired subnet
- Read the
rootlogin from the system log
This is the end of the official instructions. I at least still had a few question marks in my head, namely:
- How do I access the web interface now?
- How do I configure additional interfaces?
- How do I route incoming and outgoing Internet traffic of my VPC through the firewall?
These are all questions that are answered in the OPNsense doc, of course, but not for a cloud environment like AWS. Here, several things work a bit differently. Interfaces can be exchanged at will and never have a public IP address at the interface, but always get an IP address that is NATed by the AWS network interface. This means that the WAN interface in the OPNsense only knows the IP of the interface assigned in the VPC subnet, not the publicly routable one. Therefore the checkbox Block private networks should not be set on the WAN interface to avoid possible problems.
How do I access the web interface now?
I have started my example instance with only one interface, but if multiple interfaces are configured, the assignments within the firewall can also be read from the system log. Since I have only attached one interface, it is set up automatically as the WAN interface.
>>> Invoking start script 'aws'
**********************************************************************************************************
*** set initial ec2-user password to : pxWsXjfg6AaLGUE3SABcpaVp4NAZfoA4uuWyArSm5lVWk7XcS2
*** !!! remember to change this immediately
*** openssh-key provided, set to ec2-user
*** set initial root password to : WbFpfYYeHGXeFW3JgDtgSsiiFMEd5ixJlZUNQAXSmcUH4KKFEv
*** remember to change this immediately
**********************************************************************************************************
>>> Invoking start script 'newwanip'
Reconfiguring IPv4 on xn0: OK
Reconfiguring routes: OK
>>> Invoking start script 'freebsd'
>>> Invoking start script 'syslog-ng'
Stopping syslog_ng.
Waiting for PIDS: 38322.
Starting syslog_ng.
>>> Invoking start script 'carp'
>>> Invoking start script 'cron'
Starting Cron: OK
>>> Invoking start script 'beep'
Root file system: /dev/gpt/rootfs
Sat Apr 23 15:10:40 UTC 2022

*** OPNsense.localdomain: OPNsense 21.7.7 (amd64/OpenSSL) ***

 WAN (xn0)       -> v4/DHCP4: 10.0.11.212/20

 HTTPS: SHA256 51 7C 57 2A 47 FD FD CB 52 05 46 C8 F1 78 F9 61
               FF 96 8B A1 0F F9 8E E4 3F D5 B4 5E AB 4D CA 13
 SSH:   SHA256 9AxRm2g3/vD2TC9h77V7DgTuBUmDA+9j/qENjzPHZlA (ECDSA)
 SSH:   SHA256 9UgfN3uJ8ZUpnazdzONTq0XowjTzUAQs/jldQpxSt9w (ED25519)
 SSH:   SHA256 bKtGwJ0c5WjKKbAPMF1dQsS76M1P/NC1QwBfkwqXl5w (RSA)

FreeBSD/amd64 (OPNsense.localdomain) (ttyu0)

login:
As mentioned before the interface gets a private IP. To access the web interface now we have to do the following:
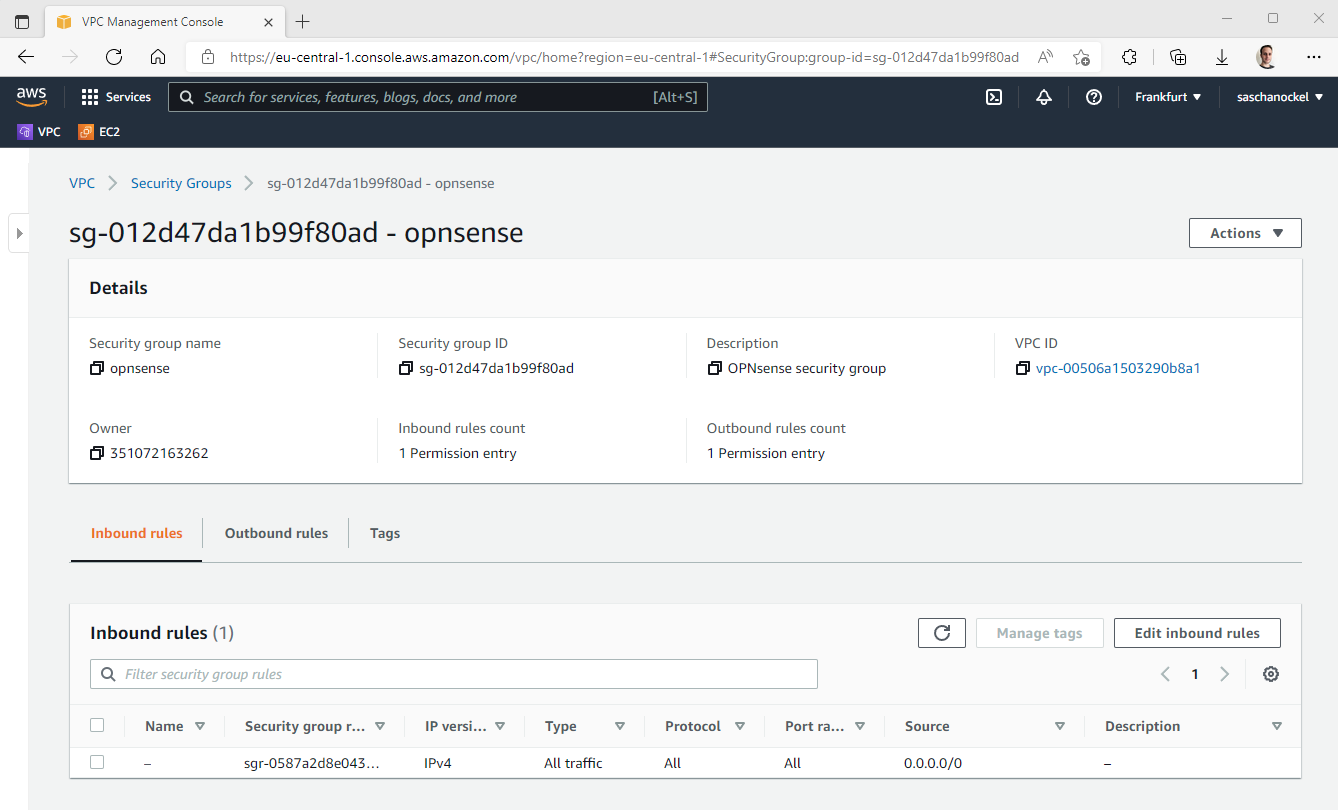
- Assign a Security Group to the instance and open the inbound port
443. - Assign an Elastic IP to the WAN interface of the instance
- Access the web interface via the Elastic IP
The Security Group is basically the firewall in front of the firewall, so in principle it can allow all incoming and outgoing traffic, since we are putting a firewall into operation ourselves. Additionally, ports can of course be blocked via the Security Group, but I tend to configure all firewall rules in OPNsense and let the Security Group pass all traffic, since finer rules can be created in OPNsense.
Now we just need to allocate an Elastic IP and assign it to the WAN interface and we are able to access the web interface of the firewall. For this to work, the WAN interface of the instance must be located in the public subnet (the one with the Internet gateway) of the VPC. For the duration of the initial setup, it is also recommended to temporarily restrict access via the Security Group to your own IP. After the setup, of course, a VPN should be used to access the web interface.
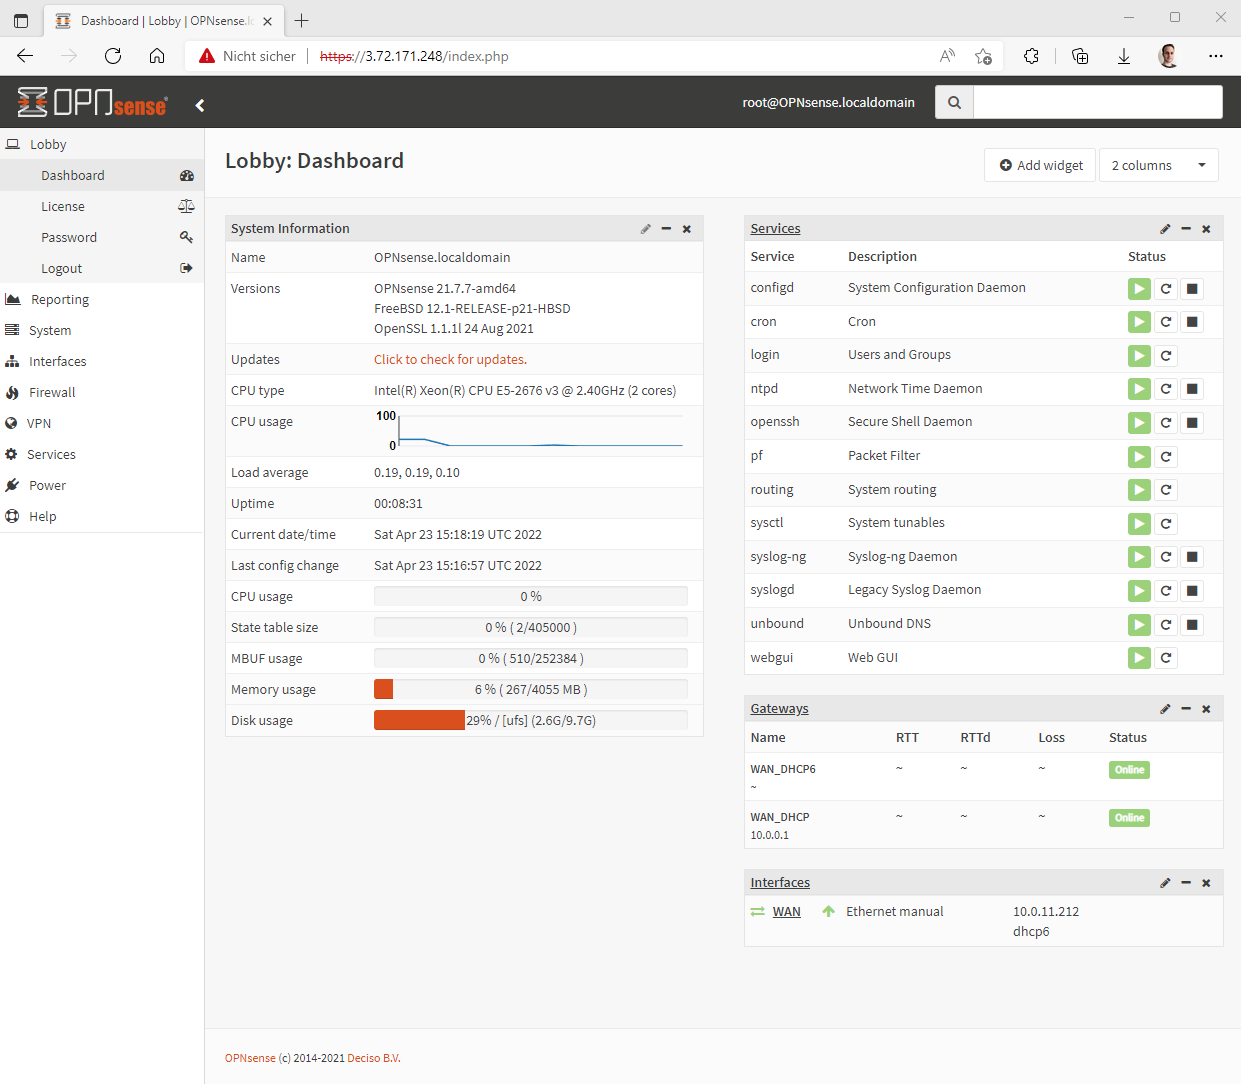
Since we are setting up the firewall freshly, it should of course be updated to the latest version of the firmware before going any further.
How do I configure additional interfaces?
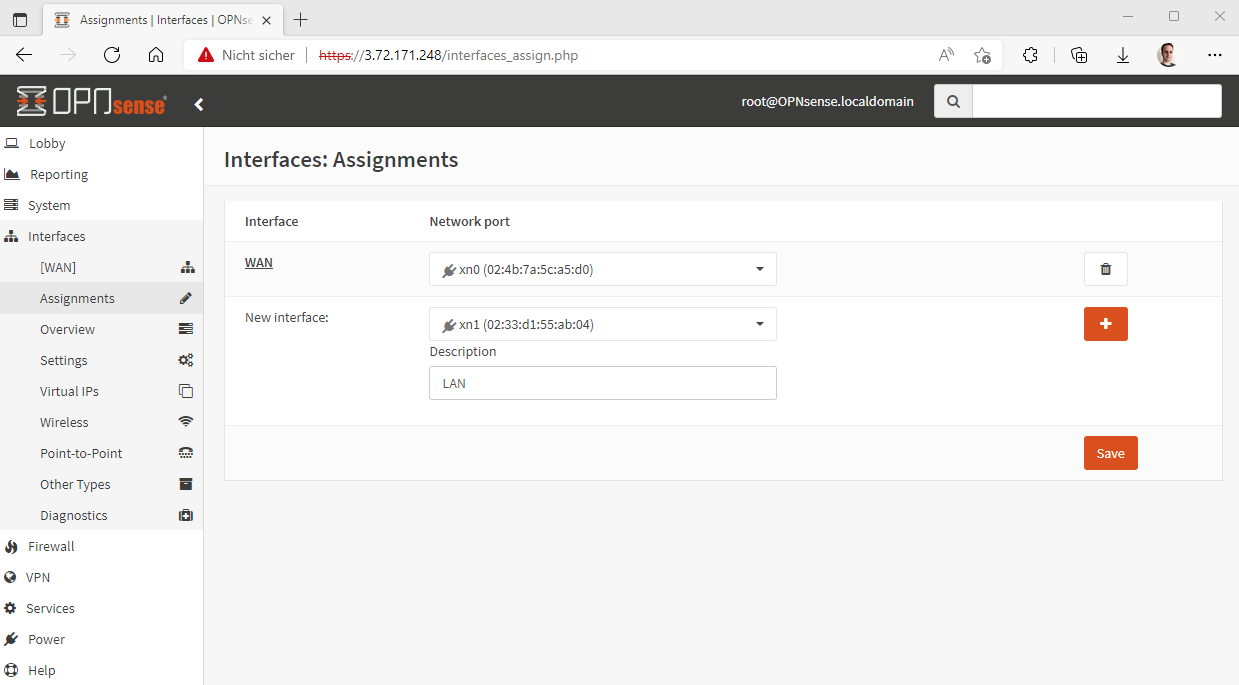
After the firewall is up to date we also want to add a LAN interface so that we can use the firewall as such. To do this we need to create a new network interface in the AWS console, the interface should then be placed in the desired LAN network and assigned to the EC2 instance. The firewall does not need to be restarted for this. The interface should be selectable in the OPNsense web interface directly after the assignment via the AWS console.
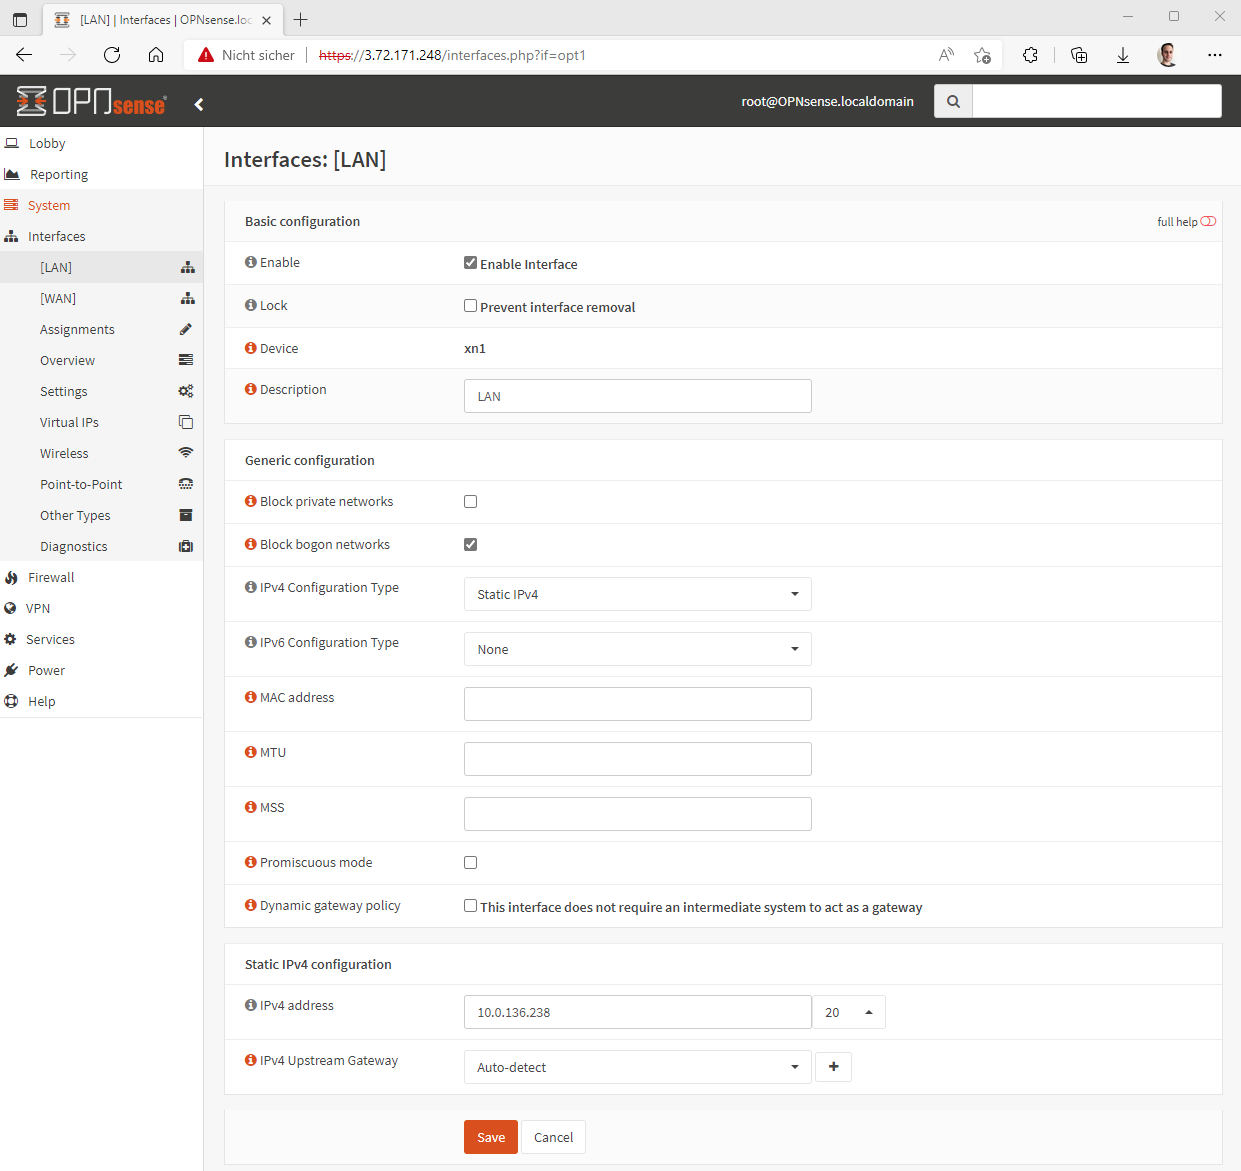
After that the LAN interface can be configured, the following settings have to be made:
- Activate the interface
- activate
block bogon networks - Set IPv4 configuration to static
- Enter IPv4 subnet
In the WAN interface IPv6 Configuration Type can be set to None if no IPv6 is used, but the IPv4 configuration should remain set to DHCP, also the checkbox Block private networks mentioned at the beginning should be deactivated.
How do I route incoming and outgoing Internet traffic of my VPC through the firewall?
Now that we have set up the firewall and configured the LAN network, after the first firewall rules have been written and any other configurations such as setting up an OpenVPN server have been completed, systems behind the firewall should now only be accessed through the firewall. At the same time, the systems themselves should no longer access the Internet through a NAT gateway, but also through the firewall. Through this not only the incoming but also the outgoing traffic is monitored, which is especially interesting if IDS/IPS is to be activated.
In order for the firewall to be able to route traffic that does not come from the firewall itself or has the firewall itself as a destination (e.g. all traffic that goes from systems on the LAN to the Internet), the Source/destination check must be disabled in all network interfaces of the firewall in the AWS console.
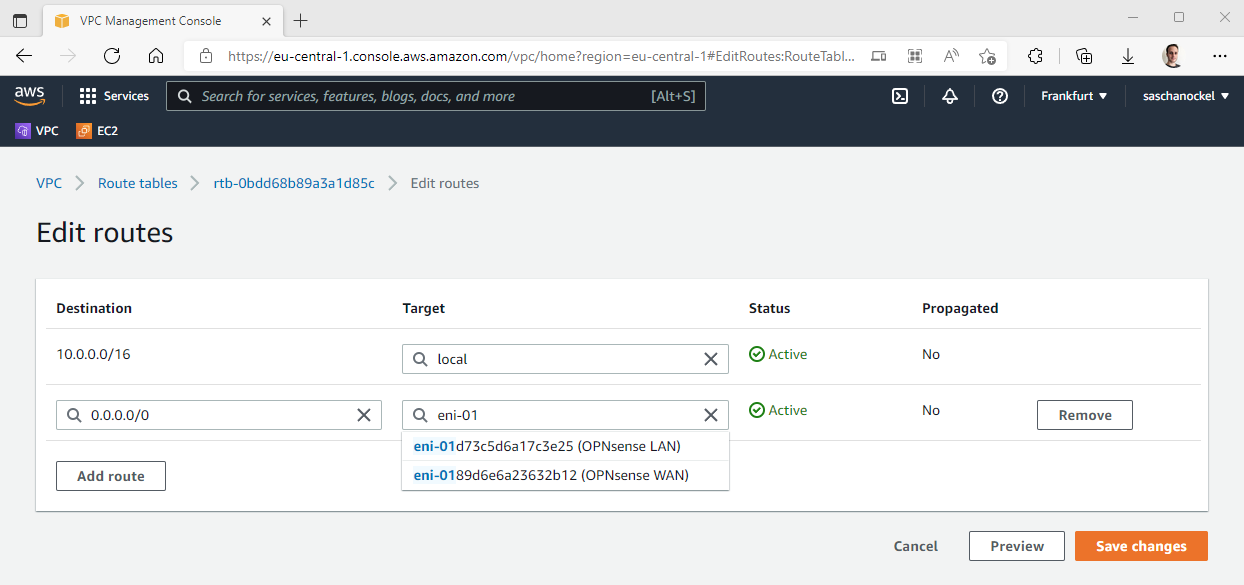
In order to now route the Internet traffic of the other EC2 instances in the VPC through the firewall, the routing tables of the VPC must be adjusted via the AWS console. More precisely, all routing tables of the private networks that previously had a route to 0.0.0.0/0 via the NAT gateway must be adjusted so that the traffic for 0.0.0.0/0 is no longer routed to the NAT gateway but to the LAN interface of the firewall.
Thus, all traffic from the VPC subnets is routed through AWS and external traffic is routed through the firewall.
Of course, for this to work properly, the firewall rules must be configured so that, for example, the LAN interface allows incoming traffic from the systems behind the firewall. Finally, it should be noted that for port forwarding rules, the private IP address of the WAN interface must be specified as the Destination, since the interface is located behind the NAT of the AWS network.
Translated with www.DeepL.com/Translator (free version)